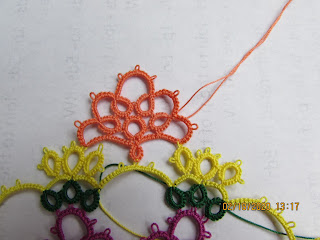
I had to do it my way to get it to work out correctly.
I started at the ring where the "tails" are coming out,
tatted the top section, then came across the bottom
joining appropriately.
Now I believe I have 10 more to do.
Now I believe I have 10 more to do.
Have a wonderful day!!! :)


11 comments:
Stunning!!! Can't wait to see it in "full bloom" !
I agree about starting at a side ring rather than a chain. Although I might've gone the other way (doing the inner part first, then the outer) for easier handling.
Great job
Good start, we’ll done figuring out a method that works for you.
Thank you both!!! :)
muskaan, I tried with the small ring on the bottom first, but I couldn't get my rings to face the correct way, so starting with the top rings helped me to have the "front" facing the correct way, and then the only ring facing "backward" is the tiny one joining to the yellow.
You've chosen the perfect color! I've sometimes switched where to begin a round also. Sometimes we just need to adapt to make things work for us.
Oh my. I enlarged it and sorry to say you joined it to the wrong ring in the previous round. Bless your heart it should have been joined to the 3rd ring not the middle ring. Just say a prayer for me. I enjoy your blog! Sandy R.
Thank you Diane!! :)
Thank you Sandy!!! :) And thanks for noticing my mistake before I got farther into trouble!!! ;) Thankfully it will be easier to fix since I now know how to tat it!!
This beautiful and I just read last comment so I am sure it's all fix by now have a great day😁💐😁
Thank you Madtatter80!!! :)
Ummm....well, it was fixed....until I realized I attached it backward-oh man!!! I will try again tomorrow!!
Dziękuję za odwiedziny u mnie.Podziwiam Twoje prace są bardzo interesujące!
Dodaję Twój blog do ulubionych
Pozdrawiam serdecznie Ela
Thank you Ela!! :)
Looking lovely cant wait to see more
Post a Comment