Monday, December 23, 2013

Merry Christmas and a Blessed New Year to you all!!!

I am still around and still tatting(when possible).   I have several completed projects to show, but they are Christmas gifts...so I will post them when I can in the new year.  
I have been busy with running my dad and a friend to many, many doctor and hospital visits and they will continue into the new year so.....if you don't see me on for awhile(like recently), it's due to so many things taking up my time and tatting time.  Thanks to all those who have encouraged me in this wonderful craft!!  You are all blessings to me!!!  :)

Thursday, November 14, 2013

2013 25 Motif Challenge # 8 Suncatchers

My mother-in-law wants 2 more suncatchers for her lampshade here: http://hiskid66.blogspot.com/2012/08/just-something-to-show.html
Well, these 2 are done with a different pattern than those already on the lampshade.  This pattern is Silver Charm Suncatcher Ornament from the Big Book of Tatting by Darlene Polachic.
They are tatted in Lizbeth size 40 Autumn Spice, and Honey Drizzle.  They both have the same beads which were a from Jon http://tatsaway.blogspot.com/ .  They are in bangle bracelets.  :)  I am going to save them for her Christmas present!  ;)

Saturday, November 2, 2013

Great Surprise in the mail!!!

 I received a package yesterday that surprised and blessed me!!  I had won a guessing game on a tatting project and was told I was to expect a package.  Well...I had forgotten with life getting so busy.  And so it was truly a surprise!!!  It was from Kristen(http://worldwidetatting.blogspot.ca/).  There is a tatting book in a different language(with cool looking tatting diagrams-gonna have to try some sometime), a tatted motif(at the top of the book marking one of the diagrams I want to try), a sweet car, 2 shuttles(in the tin), and a beautiful doily!!!!!!!!!!!!!!!!!!
The Sunburst(spiderweb) doily is now gracing my angel and drawing great attention!!!  :)  Thank you so much for you generous gifts Kristen and for the awesome Sunburst doily!!!  :)
 And this is just a picture to show a few little bits of my displayed tatting and Jon's(http://tatsaway.blogspot.com/) doily I won quite some time back, and have displayed with my daughter's hand-blown glass glow-in-the-dark dolphin from Dollywood.  :)

Tuesday, October 29, 2013

2013 25 Motif Challenge # 5,6,& 7 **Still here and tatting when possible

Been desiring to tat, but life has REALLY been in the way!!!  
Last night I decided to try and empty some shuttles by doing some motifs.
The first is Motif #16 from the book Motifs for Marie(which came from Fox).  There are 3 joined(and might possibly have more later).  Tatted in size 40 Lizbeth Lilac Dk. and Scottish Thistle.
 Next is Motif #25 from the same book.  
It's tatted in size 40 Lizbeth Raspberry Pink Med. and Raspberry Frappe.
 This last one is the Chain Point Motif from the book Tatting the Self-closing Mock Ring for GR-8 Design by The Shuttle Brothers(I believe this book came from Fox too).  It's tatted in the same threads as the motif above(it was actually tatted before the above motif).  I really love this motif and hope to do it in better colors!!!  :)  I have marked several patterns in this book to try later!!  :)
I am still in the middle of several projects which have been sitting till I have clarity of mind and plenty of time to work and prayerfully finish them.  :)

Monday, September 23, 2013

2013 25 Motif Challenge #4

I have finally gotten back to my challenge!!  I have 3 challenge pieces in progress right now, so I will be up to 7(hopefully soon!!).  This is Motif 5 from Tatting the Self-closing Mock Ring book by The Shuttle Brothers Gary and Randy Houtz(which I received from Fox).  As the more experienced tatters can tell-it's not good, just ok.  I am going to attempt it again later, but I did get it done!  :)  It's tatted in size 40 Lizbeth Blue Ice.  Hope you are having a great tatting day(or at least a great day!!).  :)

Saturday, September 7, 2013

Am actually tatting

I have actually been tatting when I get the chance, but I haven't been able to show much.  I tatted an Autumn Spice garland, but I haven't got a picture of it yet(I will).  And while sitting at the hospital with a friend an older man asked what I was doing(tatting dreamcatcher earrings) so I showed him, and he saw my small garlands and he asked if he could buy the silver with red, white, and green thread-so I made a sale sitting in the waiting room.  And, I started this pattern from Jane Eborall found here:  http://www.janeeborall.freeservers.com/CelticFriendBracelet.pdf
I love her colors!!!  I am making this for a friend with Cerebreal Palsy(hopefully it's spelled right).  And when I am done with this bracelet I have to make me the same one cuz' she wants us to have friendship bracelets(mine will have a blue center-her favorite color is purple, and mine is blue).  :)  
This is a project which takes tons of my attention and really good lighting!!!

Tuesday, September 3, 2013

Changed some of my blog settings and believe I can get replies now. :)

With the help of Lelia I believe I won't miss replies any longer(time will tell).  Thanks to all who comment and encourage me!!  :)

Friday, August 30, 2013

Autumn Spice Dreamcatcher Earrings(from the tutorial)

I scanned these 5 different times trying to get the charms on the left to behave, but I gave up on those disobedient charms!!  Here is the pair of dreamcatchers I started when making the tutorial.  :)  Tatted in size 40 Lizbeth Autumn Spice.

Thursday, August 29, 2013

For Helen: a hand drawn diagram of the Pinkie earring pattern

This is (hopefully an understandable) diagram of how to tat the Pinkie Earrings pattern from https://www.facebook.com/Tattingbox  .  
Hope this helps Helen!!  :)

Wednesday, August 28, 2013

Dreamcatcher Earring Tutorial **for Michelle!! :)

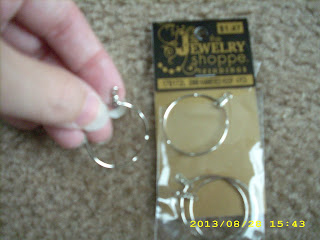
I first start off with these 30MM Hammered Hoops (I get at Hobby Lobby).
 Here you can see the hammered indents around the top one a little better.
 You can start with a shuttle loaded and still connected to the ball, but I had a shuttle half full already so I tied a knot to start.
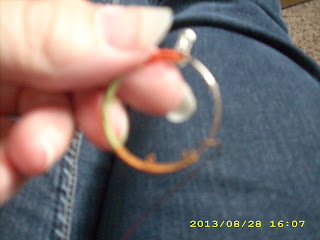
 I place the knot behind the center of the top part of the earring(shown best in top picture) holding the earring upside down and backward(the next earring will be upside down and frontward to get a mirror effect-and this earring will be tatted on the backside of the earring, and the other will be tatted on the front side of the earring). I start by wrapping the ring(and covering one of the "tails" of thread.  I have the thread on this side of the earring and go around the back side to start to wrap it.
 Coming from the backside and catching the thread and pulling it up in back.
 Now, I go to the front side and catch the thread and draw it up.
 Sorry the picture isn't very clear.  I am trying to show that I am wrapping that "tail" in and then I trim it off after about 4 stitches.
 Same here.
 I continue covering the hoop up to the first hammered indent.  At this point I make a picot.
 This picture is a tiny bit clearer on showing the indent.
 I try to make a space of thread up next to the hoop to become a picot.
 Then I tat 2 ds(easier to move into place without the first one falling apart).
 I know it doesn't show well, but there is a tiny picot there.
 Here you can slightly see it near the thread.
 Continue wrapping(or covering) the hoop all the way around making small picots at each indent.
 When I reach the top I start making a chain going in the same direction I just wrapped the hoop in.
 I estimate how many ds I will need by tatting(usually 4 or 5) and sliding them snuggly next to each other and seeing if that is about half way between the start of that chain and the first picot, if it is I tat a small picot and put the same amount of ds after the picot and join to the picot on the hoop.
 Here I am making the first join to the hoop.
 Pull the shuttle thread through the first picot on the hoop and ...
 make a lock join by putting the shuttle through the loop and slowly closing it.
 Continue this all the way around the hoop.


 When you get around toward the top you don't go to the center, you join to the picot of the first chain(so you may have a few extra ds than you would any other time).
 Here's a small video that hopefully shows how I hold that hoop and tat.  You may have to find your own way to hold it.  (Apparently this video doesn't work , but it's showing a little bit of what I wanted to get across).  Sorry it's so fast.  I have no clue why it's doing this.
 When you get to the center you just cut and tie.  I add a dab of fabric glue to knot and let it dry and then I trim the ends.
 Here's the front.
 Next, I take a feather charm and string it onto the shuttle and tat a chain(spiral, lock chain, or zig zag) from the charm out....
This is not a very long chain, usually about 1 inch.  I use this to hold the charms on the dream catcher. 
 Sorry, this picture isn't good either, but I think you can see, I hold the little chain with the charm against the hoop to see it it's long enough...
 if it is, I cut the threads(a bit long) and pull them through the bottom hold on the top piece of the earring till the chain is through the hole.
 I pull it through from front to back, and then....
 I pull it back to the front around the metal piece.  I usually have the charm up a little and then add the other to hang a little lower than the first.
 I string it on one thread....
 then I put the other thread through the other way....
Pull the strings up snug, and tie them in the front, then around the back and a second time in back to knot them.  Add a dab of fabric glue, let dry and trim.
When the glue dries I will add a scanned picture of the completed dreamcatcher.
And hopefully next year I will have a camera that can take clearer pictures.  :)