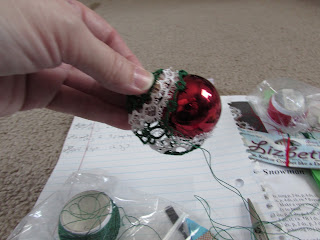
I had the top and bottom of this tatting done all last
week, but was trying to figure out what to do for the
center all the way around the ornament.
Well, I figured it out and today I finished(not perfect,
but nice for me). I thought I would show some in
progress photos so you would have some idea of
how I put tatting on glass ornaments.
The first picture is the tatting joined by the center
about 1/2 way around sitting by itself.
This next picture shows how I slide the ornament into
the tatting.
Then, while carefully and quite challenging, I hold the
ornament in my hand while finishing the tatting around it.
And more....
And carefully "resting the ornament"on my hand (which
has a tendency to roll and swing off my hand), while
tatting a ring. I finished that bare section where you
see the red.
And, it's on the display.
I bit of a close-up. I made the white frilly to
try to make it look like snow.
Here are the first 2 on. The first one is larger
than this one. And both of these are smaller than
others I made years ago.
I have also added about another 2-4 motifs to the
tablecloth this week so far.
Happy tatting and have a wonderful day!!! :)


7 comments:
Beautiful ornament! Aren't those display stands fun? I can hardly wait to see it filled!
Thank you very much Diane!! :) Yes, the display stand is fun, and I can't wait to see it filled either!
That's really pretty! Thanks for showing us how it was done. When I tatted covers a few years ago, I 'cheated' by joining the two halves by lacing a thread between them.
Beautiful ornament' I like your stand it's going to be wonderful at Christmas
Thank you both!!! :)
Jane, that is the way the first one is done(and rather sloppily I must admit).
I love your process pics and tips ! Must keep in mind when I get around to doing these.
Thank you muskaan!!! :) It's not easy!!
Post a Comment